So, I’ve had a couple of people recently ask “How do I add a domain name to Magento 2?”.
I did have plans to do a short video on this in the near future. But for those who cannot wait, this post will serve as a point of reference for the time being. Luckily, it’s pretty simple.
Prerequisites
I’m putting this together on the assumption that:
- You’ve watched the How to install Magento 2.3 video.
- You have already purchased a domain name from someone.
Pointing your domain name to your server
The exact instructions on how to do this, will vary with every single Domain Provider. However, the fundamentals are all the same.
So, you’ll want to login to your Domain Provider account and look for DNS Records, DNS Settings or something like that… Once you’ve located these settings, you will see a table “similar” to this.

For the most-part, you can ignore everything in the table. You’re only looking to change the A records. As you can see, there are 2 Type A entries in this table. One has a Hostname of @ and the other has one of www.
When I first purchased this Domain name, the IP addresses for the 2 Type A entries contained the Domain Providers own IP address. This will also be the same for you. I then edited the 2 Type A entries and replaced their IP address with the one of my web server.
You will have the option somewhere to amend the TTL (time-to-live). I don’t really want to get into this here, but if you know what you’re doing then don’t forget to amend this to 24 hours (if required) when making your IP changes.
It will take anywhere from 1 to 48 hours for the changes that you just made to take effect. In the meantime, continue to use Magento 2 as it is.
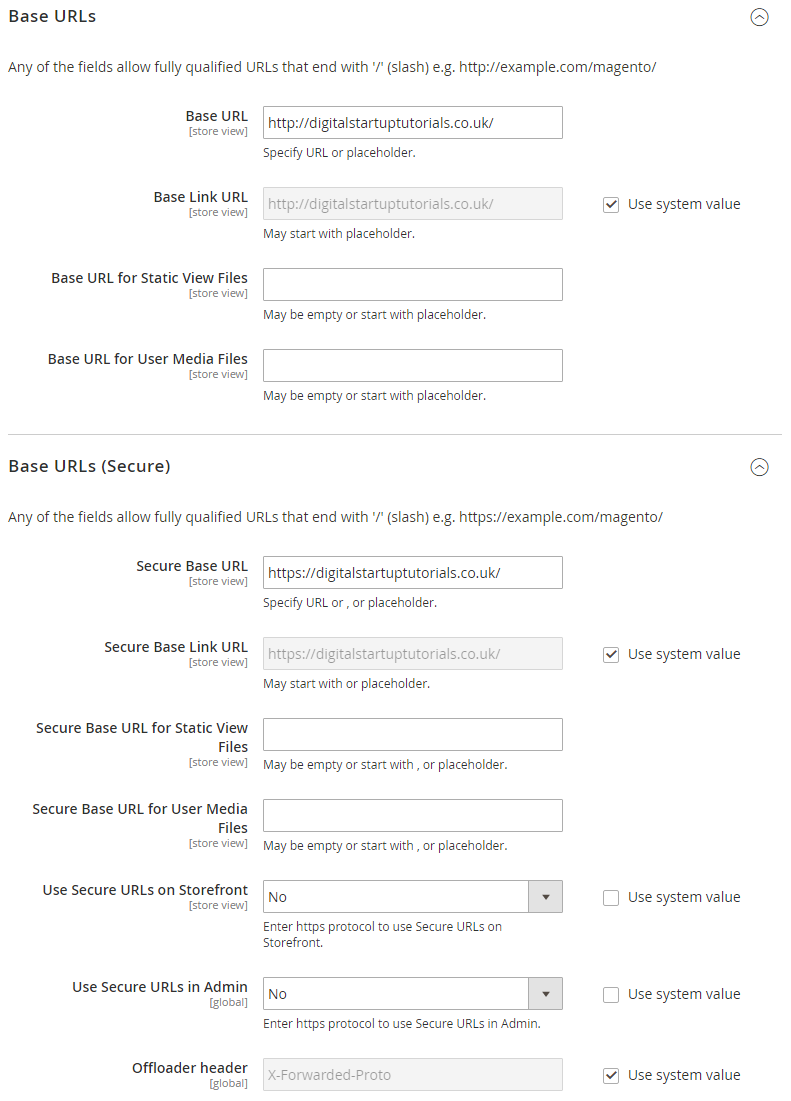
Updating Magento 2 Base URLs
Assuming that you’ve waited 48 hours for your Domain DNS changes to take effect, you are now ready to update Magento:
- Head to
Stores > Configuration > General > Web - Expand both Base URL and Secure Base URL.
- In the Base URL Field, replace the IP address with your Domain Name**
- In the Secure Base URL Field, replace the IP address with your Domain Name**
- Hit Save
- You will now be kicked from Magento and see a “This site can’t be reached" error. This is totally normal after changing the Base URLs.
- From the Command Line, you’ll want to clear the Magento cache. You can do this by running
bin/magento c:c - Next, type the URL you applied to your browser to load your site - And that’s it!!
Important
- Be sure to not accidentally remove the beginning or end when updating these fields
- If you see an error still after Step 8, you may need to clear your Browser’s cookies
Side Notes
- When installing Magento 2 and running the Web Setup Wizard for the first time, you may have noticed that you had the option to enter a domain name at that point. My recommendation is to always leave it as an IP address during setup and installation. As if something goes wrong - It’s one less issue to diagnose. Also, this only works if you have already pre-purchased a Domain Name and updated the DNS settings well in advance of installing Magento.
- This post only covers setting up HTTP (Port 80). If you require instructions on setting up HTTPS (SSL/Port 443), then this is another beast that you’ll need to work through. My advice here is to consult the Documentation from whomever you purchase your SSL Certificate from.
Anyway, I hope this helps until I record a video 