 - Magento 2 Tutorial")
In this tutorial I’ll show you how to run an actual Ubuntu Server on your PC - Which should be indistinguishable from working on a real Web Server - All with the help of a program called VirtualBox.
Despite that this tutorial explains the process for Windows 10 users, I can only imagine that this would also work for Mac users (as VirtualBox also runs on Mac).
Contents
- Preparation
- Create a VirtualBox (Virtual Machine)
- Installing Ubuntu Server 18.04
- Connecting to your Ubuntu Server
- Convert to a Web Server and Install Magento 2
Important: This is a standalone tutorial, therefore additional support in other topics will be limited. Consider this a starting point to help you get into VirtualBox. For additional support regarding issues or further advancement, refer to the links at the bottom of this post.
There are many benefits to working with an online server when developing your Magento stores. However, there are also some for working locally. A common way to do this is by using Windows Applications like WAMP or AMPPS. These install software such Apache, PHP and MySQL to help run Web Applications.
However, these Windows Applications can make it incredibly difficult to control your working environment - Especially, when working with more complex Web Applications such as Magento.
Therefore, I think that it’s important to introduce you to the concept of running a Virtual Web Server on your Windows 10 PC and hopefully by the end of the video you’ll understand why it’s such a superior choice.
1. Preparation
So, before starting this tutorial I already downloaded:
Once download I installed VirtualBox, selecting all of the default values when prompted. The Ubuntu file is like a virtual CD. I’ve left this somewhere safe for later.
2. Create a VirtualBox
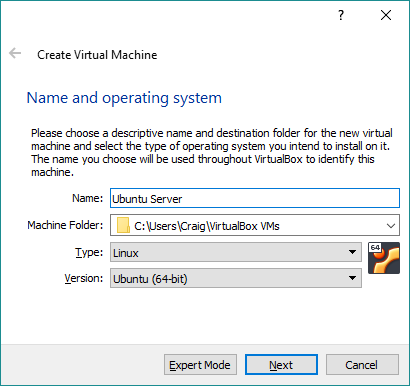
2.1 Name and Operating System
Now we’re going to create a new Virtual Machine by clicking the New icon. For any DigitalOcean users out there, you can think of this like creating a “Droplet”.
Next, you’ll want to name your Virtual Machine - I’ll call mine “Ubuntu Server”. The 2 dropdowns should be smart enough to update to the appropriate settings because it’s noticed I’ve used the word “Ubuntu”. If yours doesn’t then make sure:
- Type: Linux
- Version: Ubuntu (64-bit)
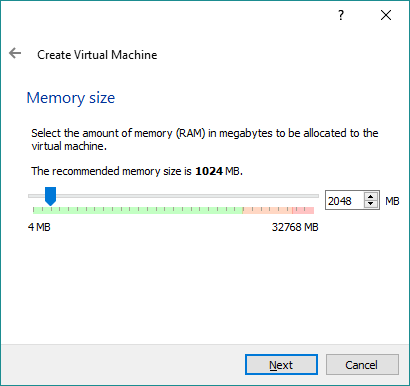
2.2 Memory Size
The next screen will ask what Memory (RAM) you’d like to allocate. Use the slider to select at least 2GB (2048MB) - 4GB (4096MB) is better if you have the resources
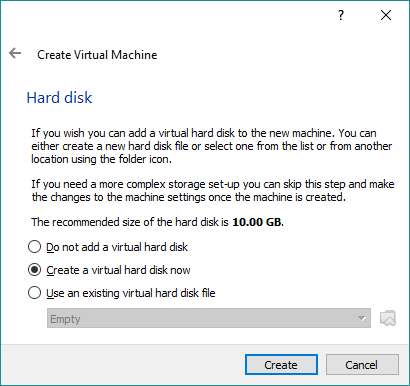
2.3 Hard Disk
Next we need to select our Hard Disk. This is our first, so we’ll leave the default value as Create a virtual hard disk now.
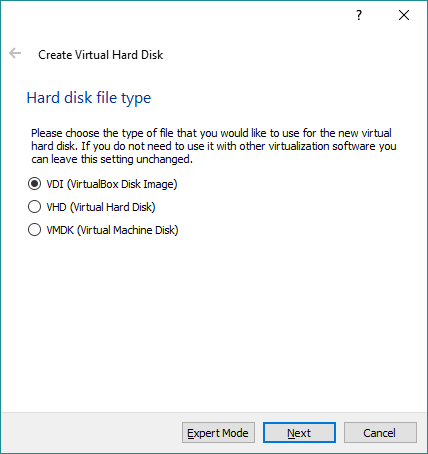
2.4 Hard disk file type
On the next screen, leave this as VDI (VirtualBox Disk Image)…
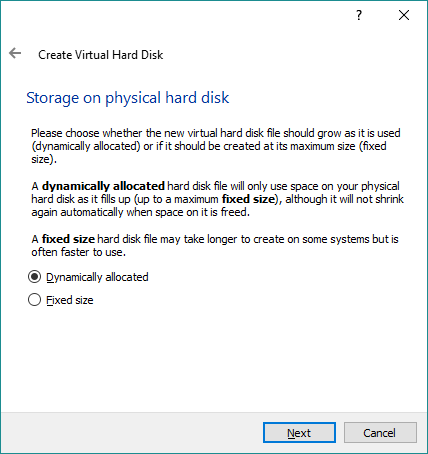
2.5 Storage on physical hard disk
Then on the next screen leave it set to Dynamically allocated.
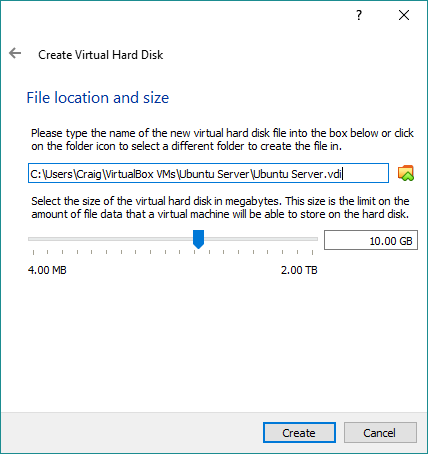
2.6 File location and size
And on the final screen leave the default values and press Create.
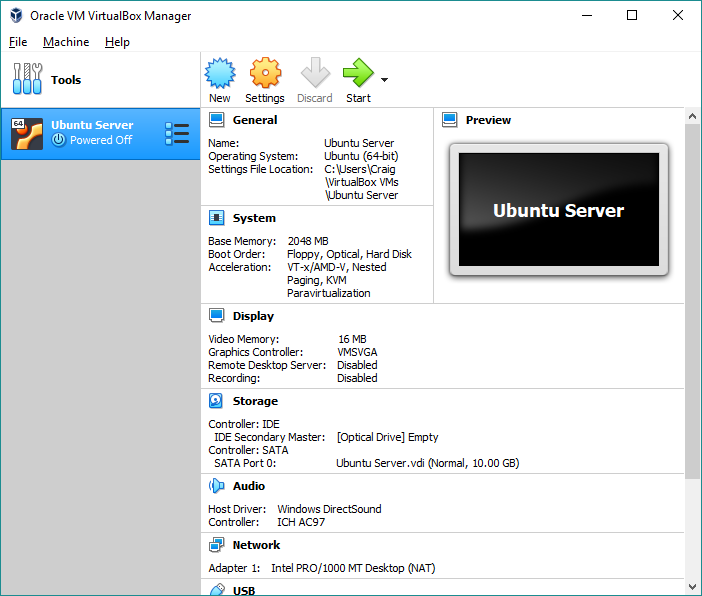
2.7 Final Result
You’ll now see the details of our Virtual Machine.
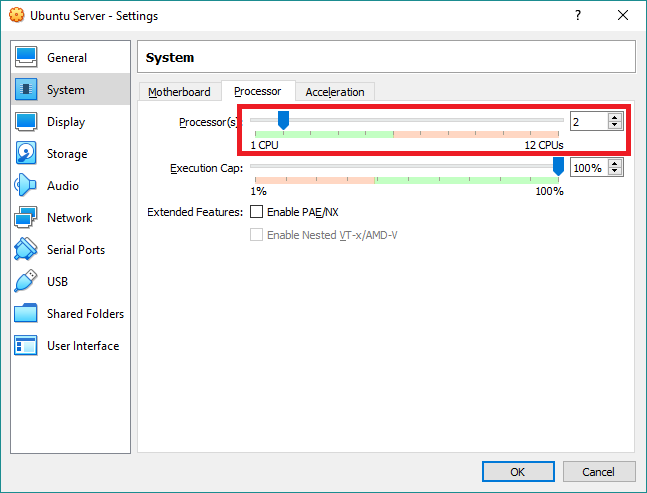
2.8 Increase the Cores
Earlier, we got to set our Memory (RAM) to minimum requirement of 2GB. However, during testing I found improved performance after increasing the amount of Virtual Processors. To do this, right-click on the Virtual machine from the left, choose Settings and System. Under the Processor Tab, drag the number of CPUs from 1 to at least 2 - And then hit OK.
3. Installing Ubuntu Server 18.04
3.1 First Time Boot
Now we get to boot up our machine for the first time and install Ubuntu. Installing Ubuntu Server is very similar to installing any other Operating System on a clean Hard Drive if you’ve ever done that before.
So, let’s get going by hitting the tiny arrow next to the Start icon. You’ll see 3 different options:
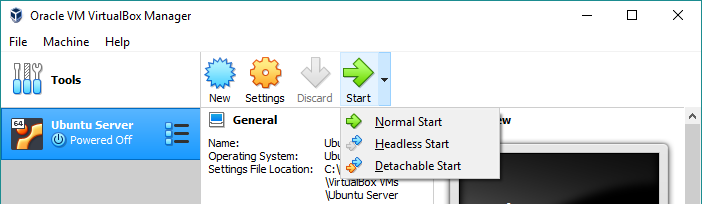
| Start Type | Action | Virtual Monitor | Note |
|---|---|---|---|
| Normal | Start Server | Opens | Closing Virtual Monitor forces Server Shutdown |
| Headless | Start Server | Does not open | Can be opened after with the “Show” icon |
| Detachable | Start Server | Opens | Closing Virtual Monitor does not force Server Shutdown |
The best option to choose right now is Detachable Start. This is because we’ll need the Virtual Monitor to help install Ubuntu. But we can close the monitor afterwards and allow the server to run in the background.
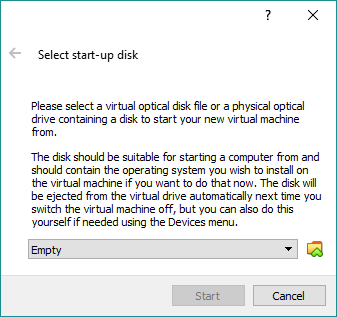
3.2 Select a Start-up Disk
The first time you boot, a window will popup asking us to select a startup-disk. This is where we need to select the Ubuntu Virtual CD that we downloaded earlier.
Note: If you do not see a prompt about a startup disk, select: Devices > Optical Drives > Choose Disk Image
Once you’ve selected the file, press Start.
Note: If you only see “FATAL: No bootable medium found! System halted.”, then it just means you took too long selecting the start-up disk. So, simply select Machine > Reset, which will reboot the server with the Virtual Disk in the Virtual Drive.
3.3 Installing Ubuntu
On the Virtual Monitor you’ll then see Ubuntu go through the installation steps. Some of the text output and pauses may lead you to think that the installation has failed - But just be patient for a few moments and you’ll eventually see the first step of the Installation pages.
Quick Tip: If you ever click inside of the Virtual Monitor and lose your mouse cursor, press Right Ctrl (default shortcut) to bring your mouse back to your PC.
Quick Tip: When typing, it’s important to remember thing like Caps Lock and Num Lock are independant on your Virtual Machine and PC. In other words… In Caps Lock is enabled on your PC, it doesn’t mean it will automatically be enabled in the Virtual Machine.
3.3.1 Preferred Language
Use a combination of Arrow Keys and Enter to select your preferred language.
3.3.2 Keyboard Configuration
Do the same again for your keyboard layout.
3.3.3 Network Connections
Leave the default settings and continue.
3.3.4 Configure Proxy
Leave the default settings and continue.
3.3.5 Configure Ubuntu Archive MIrror
Leave the default settings and continue.
3.3.6 Filesystem Setup
This section is split across 4 pages. Just select the default options and continue.
3.3.7 Profile Setup
Enter whatever is appropriate to you.
3.3.8 SSH Setup
On SSH setup, you’ll want to press Space to select to install the OpenSSH server - And then continue.
3.3.9 Features Server Snaps
On this section skip everything and continue and simply wait for the installation to complete.
When the installation is complete, select Reboot. After selecting Reboot, you’ll be asked to remove the “installation medium” (i.e. “startup-disk”). Luckily, VirtualBox will do this automaticall so just press Enter.
3.4 First Time Boot in Ubuntu
Now we’ll see Ubuntu Server boot up for the first time. When you see the login prompt, allow it a couple more minutes to install OpenSSH, which we asked it to do earlier. And that’s it, you now have a working Ubuntu Server running on your PC.
Unlike Ubuntu Desktop edition, Ubuntu Server doesn’t come packaged with a Graphical User Interface. Servers are generally optimised for full performance, and to run an install of Ubuntu Desktop is simply a waste of system resources.
4. Connecting to your Ubuntu Server
4.1 Port Forwarding
So, with Ubuntu now installed, we need to allow our PC to interact with the Server. Up until now, we’ve been using the Virtual Monitor. But in the real world, we wouldn’t be able to do it this way. So, let’s keep things real by limiting our interactions with typical tools such as Putty, Filezilla and Chrome
So, close the Virtual Monitor and select Continue running in the background when prompted.
Next right-click in the Virtual Machine (from the list on the left) and choose Settings.
Then select Network and under the Adapter 1 tab expand the Advanced section and select Port Forwarding.
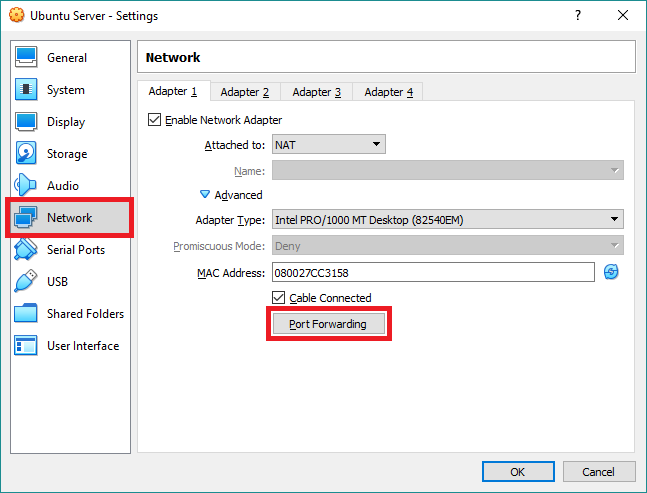
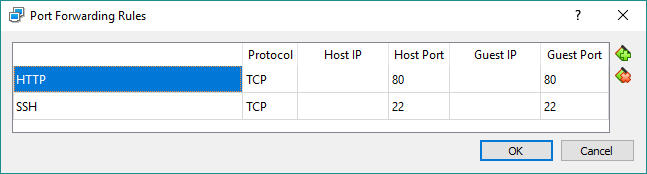
Here we want to add 2 basic rules for our HTTP and SSH ports. These ports allow us to connect via SSH and Web Browser.
4.2 Test the Connection
Right now, we can test the SSH connection by opening Putty and typing in our localhost IP address (typically 127.0.0.1). As usual when connecting to a server, you’ll see the Fingerprint prompt - Just press Yes. Now login using the credentials you setup earlier during the Ubuntu installation. Obviously, this relies on that fact that you didn’t typo your username or password during the installation.
At this stage we won’t be able to test the Web Browser on port 80, because we haven’t turned this server into a Web Server yet.
Notice: At this point, you’re all done. The following section is simply to test that the whole setup works as expected.
5. Convert to a Web Server and Install Magento
In theory, I now have a blank server that runs like any other Unmanaged Server that you can rent online. And it’s setup in just a way that makes our interactions with the server seem indistinguishable from the real thing.
So, in order to test this Virtual Machine, I’m going to run through my very own tutorial: How to install Magento 2.3 and build a web server. To save you having to watch this, I’m going to skip to the very end…
Side Note: When running the
composer create-projectcommand, I got stuck on “updating dependencies (including require-dev)” for about 7-8 minutes. I’m not sure if this is normal, but all I did was wait patiently and grabbed a coffee to kill some time. I suspect that allocating the server 4GB Memory (RAM) instead of 2GB would avoid the long wait.
And, there you have it. I’ve:
- Built a Virtual Machine
- Installed Ubuntu Server 18.04
- Made the Virtual Machine accessible via conventional methods
- Turned it into a Web Server
- Installed Magento 2.3
Additional Support
This is a standalone tutorial, therefore additional support in other topics will be limited. Consider this a starting point to help you get into VirtualBox. For additional support regarding issues or further advancement, refer to the following links:
- https://stackoverflow.com
- https://unix.stackexchange.com
- Oracle® VM VirtualBox®
- https://www.reddit.com/r/webdev
Special Thanks
I just want to give a shout out to the following article, which helped me to fill in some blanks that I was struggling with: How to Forward Ports to a Virtual Machine and Use It as a Server